Removing the old primer and inserting a new one are critical steps in reloading brass. There are several different tools on the market, from hand decapping tools, to bench mounted priming tools. Not all tools are created equal, and not every tool works equally well with every brand of brass, or caliber out there. For this reason you may find yourself collecting priming and decapping tools.
This is also true for prepping the brass to accept a new primer. Sometimes it’s acceptable to pop out one primer and exchange it for a fresh one without any prep work. However sometimes you want to do quite a bit of work. It’s all dependent on what you expect from the ammunition you are loading.
We’ll go over tools used for removing the primer, prepping the brass, and inserting the new primer. First a word on what primers we use.

The vast amount of reloading done is with boxer primed brass. This primer system is characterized by brass with a single flash hole, and an anvil that is integral to the primer, and not swaged into the brass case. While Berdan primed brass can, and is, reloaded, there are special tools and processes used that are not wholly compatible with the boxer primer system. We will not be covering Berdan primed brass in this write up.
It is important to note that primers come in Small Rifle, Small Pistol, Large Pistol, and Large Rifle configurations. Every brand of primer is a little bit different. With some brands offering a Large Rifle Magnum primer, and others offering primers that claim they are good for magnum and standard loads. We won’t go into the different types of primers in this write up, here we will focus on just the tools and accessories associated with priming.
Removing the Old Primer
Removing the old primer is sometimes referred to as decapping, or depriming. I’m not sure which word is more correct as neither are considered word by my word processor. I’ve reffered to the operation by both names, and I see it used interchangeably in both publish literature and online media.
When I get in a batched of once fired rifle brass the first thing I typically do is deprime the brass. This allows the primer pocket to be cleaned. Since the brass is dirty, I do no like to use my sizing dies as the dirt will wear the dies. Spent primers also contain carbon, and bits of glass, which can get into press and wear the components. By doing the decapping operation with a Lee Handpress, we can keep these abrasives out of our nice press and prevent premature wear.

The Lee Universal Decapping Die is one of the cheapest, and most robust options on the market. It does have it’s limitations, but for the vast majority of people you will be well served by having at least one of these dies in your collection. The die features a one piece decapping pin, which I have never broken, and it is held in place by a collet.
Using this die in combination with Lee’s Hand Press, allows you to take the decapping operation away from the bench and infront of the TV, or some other venue of choice. As long as you have the shell holder for the brass you want to decap you are good to go.
The collet is both a strength and a weakness, as it allows the decapping pin to slide backwards should it encounter undue pressure, such as trying to deprime a Berdan primed case. However it will also allow the decapping pin to slide back from pressure due to a crimped in primer. This can be extremely frustrating. I’ve tightened the collet to the point where I was concerned I would strip threads and still have had the decapping pin slid back on me. There have been times where I’ve contemplated tack welding the pin and collet together.
The small size of this die is also a limitation. It can handled cases up to about 3 1/8″ long and with a head diameter of .560in. These means that 338 Lapua, is not going to be capable with this decapping die. With that said, 308 Win, 223 Rem, and pretty much any of you other high volume rifle or pistol cartridges will do just fine.
Lee is not the only manufacturer that makes a universal decapping die. RCBS, Hornady, and Dillion also make their own versions of a decapping die. The Lee die is the only die that has a collet style pin holder, and I am not sure I’m sold on it.
Recently there have been more unconventional decapping tools released, which I have not tried but have piqued my interest. One example of this is the Frank Ford Arsenal hand depriming tool. While it still has all the limitations of the dies in terms of what calibers it can handle, I do think it simplifies things as a shell holder is not required.

Of course there is also depriming as part of the sizing operation. Most people have done this. All of your sizing dies will have a decapping pin incorporated as part of the sizing die. This pins are sometimes solid pins, in the case of Lee dies, or they can be two or three piece. For large magnum calibers such as 338 Lapua Magnum, this may be the only option available.
In these instances it may be worth picking up two dies, inexpensive die, for dedicated depriming duty, and a second die for actually sizing operations. Most decappin pins are adjustable so you can pop out the primer before any sizing is actually done.
The trouble with multi piece decapping pins is they tend to break at the most inopportune moments. These hardened pins are fragile, and if you don’t have the brass lined up just right, or if a Berden Primed case sneaks into your batch of military surplus brass, you are almost guaranteed to break a pin. Replacement pins are inexpensive, and readily available, but if you don’t have a replacement it will end your reloading session early.
Removing the Crimp
Crimped in Primers can be a real pain to deal with. Luckily for the hand loader it is an issue you have to solve only once. When the crimp is removed, it’s removed for the life of the brass, but removing the crimps can be tedious, especially if you don’t have the right tools for it.
Primers are typically crimped into place by the manufacturer in order to satisfy military contracts. It is uncommon to find commercial ammunition sold for the commercial market with crimped primer pockets. The primary reason a crimp is applied, is to ensure the primer does not fall out of the primer pocket during firing.
Firearms with loose chambers, or with loose actions can result in dropped primers. These conditions can be found on many military arms. In accordance with Murphy’s law, a dropped primer will fall,back into the action of a firearm and disable it. A potentially deadly malfunction.
A crimp is simply metal that has been displaced hold in the primer, and there are many different types of crimps. An annluar crimp, is a full circle around the primer pocket, while a staked primer, is typically two or three “stakes” that hold in the primer.


In addition to crimping the primer may have sealant or glue applied around the primer. This helps to water proof the ammunition, but can also aid in retention of the primer. Typically the sealent comes out when the primer is removed and doesn’t interfere with the seating of a new primer.
A crimped in place primer can take some force to remove. If you will be processing a lot of military surplus brass, a decapping die with a one piece decapping pin is the only way to go. It is not unheard of to have the tip of the decapping pin punch through the bottom of the primer, rendering the primer unable to be removed.
One the primer has been removed, the crimp has to be removed prior to seating in a new primer. This is done through two primary means, swaging the primer pocket, or cutting the displaced material. Removing the crimp can be done with a 45 degree deburring tool.

There are many variations on the deburring tool, but you typically want a 45 degree, that is for use with calibers from .22 to .45. This works for both small and large primer pockets.

There are cutting bits that are specifically designed to remove the crimp and provide the original radius, or bevel on the edge of the primer pocket. These cutters can be purchased singles or as a kit and are fairly inexpensive. They work well, especially when paired with a drill.
There are some down sides to cutting out the primer pocket, namely it creates a mess of brass shavings and sometimes you don’t always get it on the first try. It can be frustrating to think you had the crimp removed only to get a primer stuck when trying to seat it. It’s happened to me on more then one occasion. Thus we look to swaging the primer pocket back in shape.
Swaging is the process used to cold form the material. It is actually how the primer pocket was formed to begin with. A bunter is smashed against the head of the brass case which forms the head stamp and primer pocket all in one action. Swaging out the crimp is by far the fastest way to remove the crimp from primer pockets but you will pay for the tooling needed to do so.
The best product I’ve used to date is the Dillion Super Swage 600. It is simple to use, and it gets the job done, quickly and effortlessly. I could only justify the purchase if I processed a lot of primer crimps. Remember, once it’s done, the crimp is gone for the life of the brass.

The down side of bench mounted swagers is they take up space on your reloading bench. Depending on the size of your bench this may or may not be a problem. This is for a tool that may be used infrequently. So it is up to you to decide if it’s worth tying up the bench space for it.

I thought that a press mounted primer pocket swage tool would be the cats “meow” however the RCBS tool I purchase did not work with the Lee Classic Turrent press I owned. The issue is with how it ejects the brass on the down stroke. The cap must fit over the ram and allow it to push the brass case off the swaging stem. This didn’t work on my Lee Press, and the brass cases were quite stuck. You need something to provide a positive ejection force.
Just because I had problems doesn’t mean other people have. This tool seems to work for a lot of people. It is inexpensive compared to the Dillion Super Swage 600 and it doesn’t take up bench space. If you have an RCBS press, look at picking one of these up.
Cleaning the Primer Pocket
The primer pocket is a precision made feature on the primer. When you seat a primer, the anvil, seats against the bottom of the pocket and places the primer pellet under tension. Without this tension you can get misfires. Thus if we want to get reliable, safe, and accurate ammunition we need to care for the primer pocket, the same way we might trim brass.

The level of care is up to you, for me, I typically am the most attentive to ammunition being fired in a rifle, and less so for pistol ammunition. For this reason, I do not typically clean the primer pockets on pistol rounds, but will clean the primer pockets on rifle rounds.
There are about a half dozen tools used to clean out primer pockets. They include stiff bristled brushes or simple scrappers. I’ve used both and found both to work just fine. As noted before, the “crud” being removed is a combination of glass, carbon, aluminum oxide, and other abrasive elements. The abrasives are part of the original primer mix. They help to “sensitize” the mix. These abrasives will wear the parts on your press, so caution should be taken to make sure this “gunk” is cleaned up and not fed into your tools.

Most people are going to find cleaning primer pockets to be tedious, and thus will do everything they can not to have to do it. If they are cleaned, they are done through an automated process, such as a brass tumbler, or an ultrasonic cleaner. It should go without saying that you need to decap the brass prior to cleaning or the primer pockets won’t get cleaned.

In order to make sure the primer pockets get cleaned be sure to have media that is fine enough to get into the pockets, this applies if it is a dry media tumbler, or a wet tumbler using a stainless steel media.

Flash Hole Uniforming & Primer Pocket Reaming
Flash hole uniforming, and primer pocket reaming are two things you will either never do, or do very rarely. If you are new to reloading, then you will likely hear about these two operations and wonder if you’re doing something wrong by not doing it. The short answer is no, you’re not missing out on anything.
Uniforming a flash hole involves cutting a small chamfer on the inside of the flash hole. The same way we might deburr the case mouth after trimming, we are essentially deburring the flash hole to create a uniform transition between the flash hole and the powder column. In theory this help make ignition more consistent from round to round. The reality is less clear cut.
Uniforming the flash hole only needs to be done once, it is quick and easy to do, but I only do it for my precision hand loads. Much of the top quality brass being sold today has had this operation done at the factory, so check before you run out to purchase the tools. If there is an effect on accuracy or velocity consistency it is subtle, and I have yet to notice. Despite having done it for many, many, of my loads I am not sold on the idea that it must be done.

The same may be true of the the primer pocket uniforming tool. Some people will claim that you should cut the primer pocket so they are all to an uniform depth. This is a theory that I do not subscribe tool. This is because SAAMI and CIP already offer some tight manufacturing specs for primer pockets.

The bunting method for forming primer pockets does not allow for lots of variation to primer pocket depth. The depth will very from lot to lot, and manufacturer to manufacturer, but within a lot of brass the depth should already be very uniform. I do not believe the variation in primer pocket depth causes variation in ammunition performance.

With that said, these mini cutters do a great job getting rid of stubborn carbon fouling from inside of the primer pocket. This crud can interfere with the primer seating and in the most extreme circumstances can cause misfires. A light twist is all it takes to get rid of the fouling, anything more then that and you’ll be removing brass.
Primer Seating
It took us awhile to get here, but here we are. Once the brass is prepped it is time to insert a fresh primer into the case. This operation can be done by hand, one the press, or on a dedicated bench mounted priming tool. There are a few things you should be aware of prior to priming.

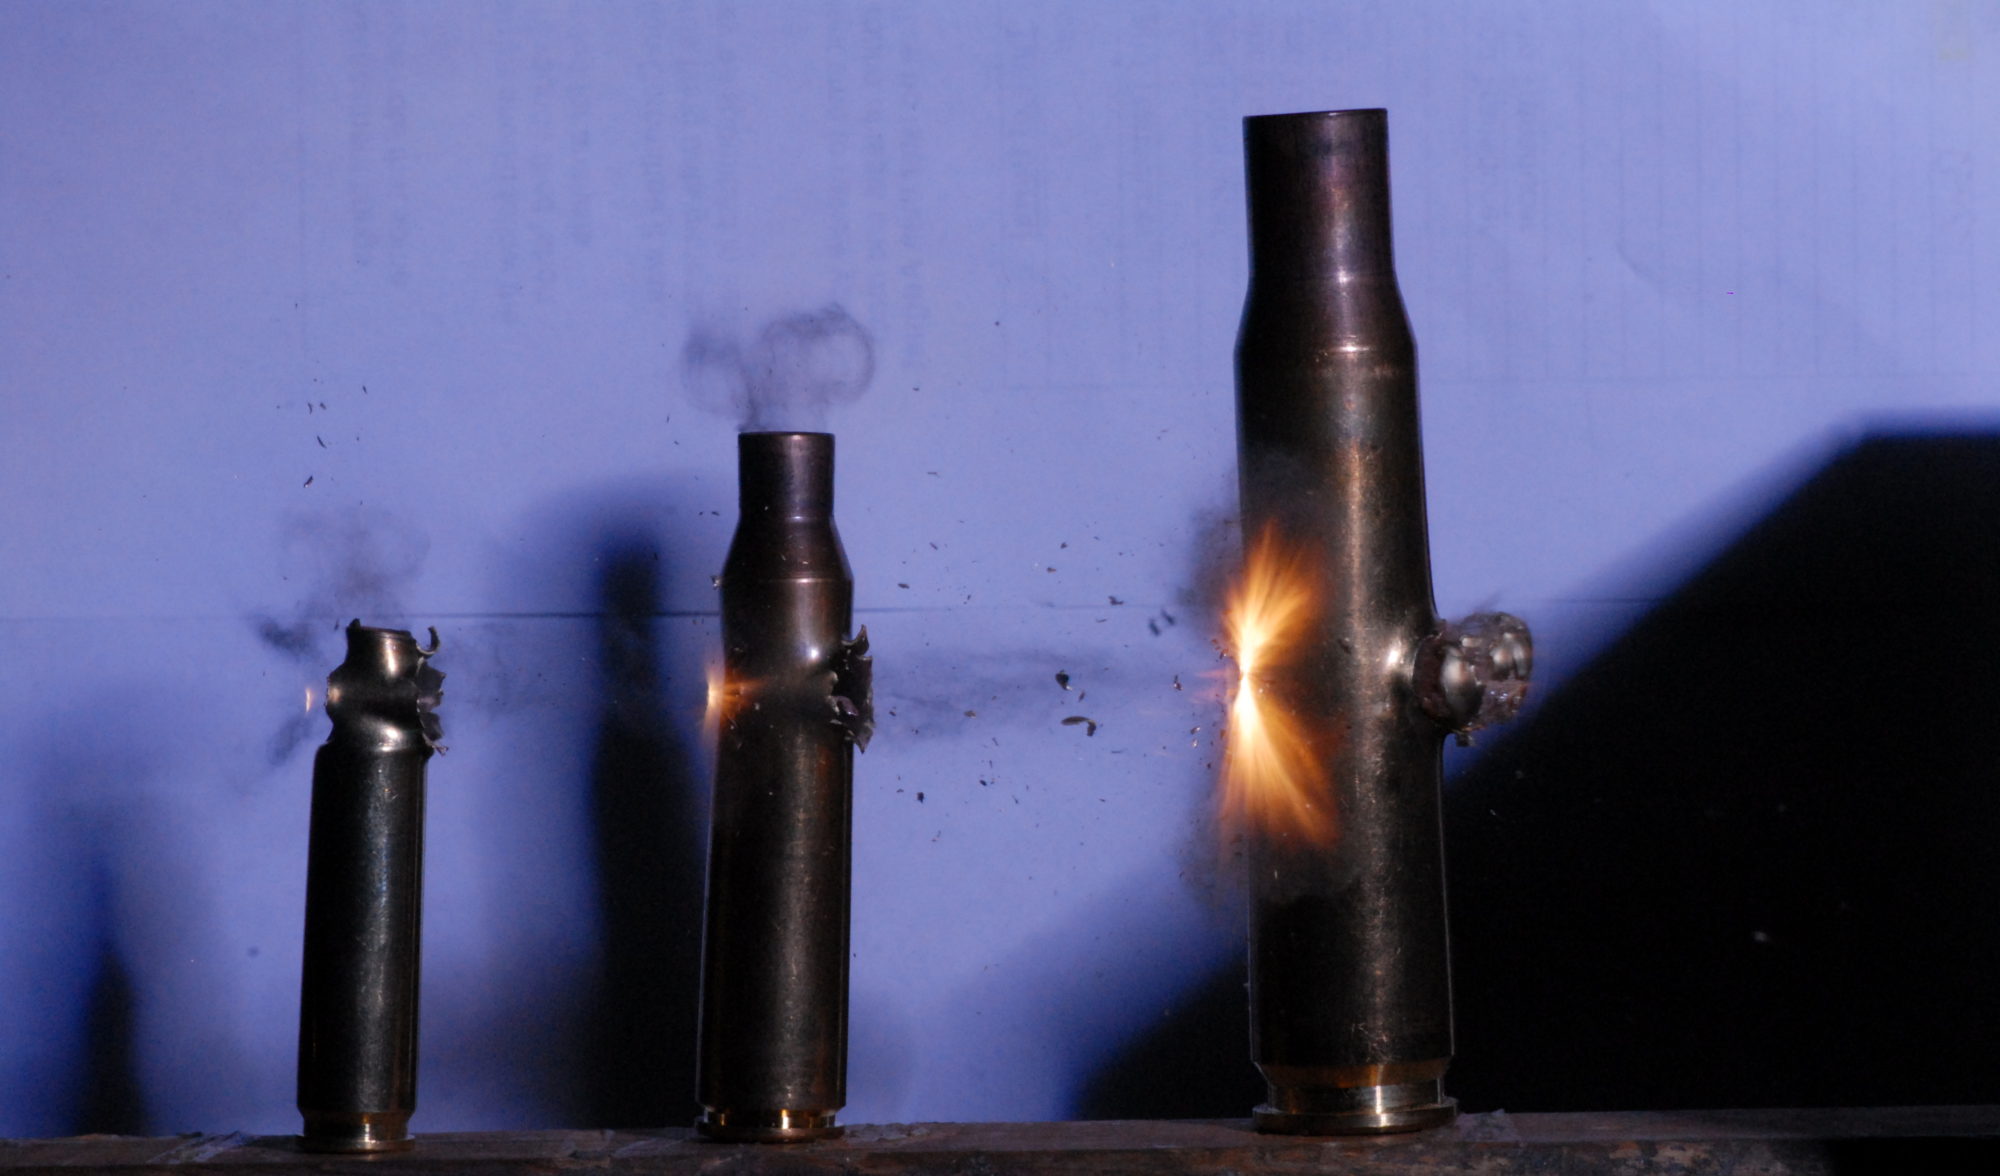
First off, primers are explosives. Most primers are using Lead Styphante as the primary explosive. When the firing pin hits the primer, it pinches the primer pellet between the primer cup and the anvil. For the primer to fire all it takes is for one of these lead styphante crystals to break. The crystal releases energy in the form of heat, breaking other crystals around it. This creates a chain reaction which expels hot gas through the flash hole and ignites the powder charge.
When handling primers you want to be careful not to shock them. You can do all kinds of things to demolish a primer and you won’t set it off, however if you shock it in such a way that one of those crystal break, the primer will go off. It is entirely possible for the detonation of one primer to set off other nearby primers. I have seen this in commercial loading equipment, where a malfunction set off one primer, and the explosion propagated around to the tray of primers and set off the whole tray.
For this reason we limit the number of primers we have in our priming equipment. If ten primers go off, it would be a surprise, but if a 100 primers go off at once, you’ll be lucky just needing a change of pants. We also wear safety glasses, and we point the priming tool away from us as we prime.
I have never had a primer go off when hand loading, but I have been in a lab, where someone else had one go off, and everyone jumped. When you use the priming tool, read the instructions and adhere to them. Most likely, you’ll be like me an never have an unintentional detonation of a primer.
Progressive presses, and many single stage presses will have their own methods for dealing with primers. All that I’ve used, I have been happy with. The key to keeping them working is to develop a “feel” for the primer seating. Once you’ve seated a couple you’ll know what feels right and what feels off. The second tip is to keep it clean. A spec of powder or debris can sometimes rest on the primer seating stem. This will leave a nice imprint on the primer cup. The primer will still function but it is not desirable.
I, like most people, started reloading with using a hand priming tool. I’ve used several different brands and found them all to a fine job.

I have used several different iterations of the Lee Precision Hand Priming tools. They all seem to function very similar to one another. They require a Lee Shell Holder, which is like a regular shell holder except the “T” is missing. You thumb gets a work out, long priming session in front of the TV, and you will end up with a sore thumb, especially if the primer pockets are tight.

So far my favorite hand priming tool is the one made by Hornady. It uses standard shell holders, and is designed so you use the strength of your hand, rather then just your thumb. This makes long priming sessions a little more tolerable. Being able to use the strength of your hand does not diminish the “feel” of the tool and you are able to feel the primer seat.

The RCBS Hand Priming tool was the favorite in the ballistics Lab I worked at. The universal head made it simple to prime just about anything up to 338 Lapua. No shell holders to worry about, just pick it up and go. However I felt that the leverage in this tool was not as great as in the Hornady tool, and the harder to primer cases became something of a hand workout.

There is one hand priming tool that I have not tried yet, but would like to. That is the Sinclair Hand Priming Tool. Since I haven’t tried it, I can’t give you any feed back. I have heard it is a very smooth tool that gives the user a lot of feel to how the primer is seating. My only concern with this too is the lack of a primer tray. When you have big meat grabbers, picking up small primers can be something of a small feat.
When I handload rifle, it is all primed off the press with a few exceptions. Those exceptions are when the primer pocket is too tight. I run into this issue with my 338 Lapua brass, made by Lapua. There is not a crimp, it just has a very tight primer pocket. For this reason I have had to prime on the press. Many presses come with the tools to facilitate on the press priming, but for what ever reason non of my presses did.

The Lee Precision Ram Prime tool, is an inexpensive on the press priming solution. I have used it to prime 338 Lapua Cases with tight primer pockets, and some cases where I had trouble removing the crimp completely. Its a good addition for the Lee Hand Press, if you still wanted to take you priming away from the bench, you can screw this in and prime while sitting on the couch watching your favorite crime show.

The last option out there is a bench mounted priming system. I have not used any of these tools as I do not want to sacrifice the bench space for something that I can do by hand. However there are many who prefer this type of priming system for one reason or another. People with arthritis or with weak hands, may find that a bench mounted priming system works well for them. I am unsure as to why you would go with this method over a press mounted solution. If you use a bench primer and you prefer it, I’d be interested in hearing from you. Let me know why you like it.
Priming Quality Control
As with any operation we do, there is the good, the bad, and the ugly. We need to have some sort of quality control. SAAMI specifies that the primer should be seated flush to a maximum of .008 below the head of the case. Most people, including myself use the finger method. We swipe our finger over the primer, and if we feel that it is recessed in the case head, then we call it good. If it sits proud of the case head we need to seat it further in.
In order to function properly primers require that that anvil is seated against the bottom of the primer pocket. Most of us do this by feel. There is a hard stop when the primer has been seated correctly. Pushing beyond this point will only deform the primer cup, and possibly crack the primer pellet. Cracking the primer pellet can cause misfires.
If the the primer is not seated fully, our firing pin strike will do that for us. However in doing so, some of the energy that would be used to set off the primer is absorbed. This increases the risk of misfire. This can also happen if there is crud on the bottom of the primer pocket, it acts as a sponge and adsorbs the impact from the firing pin, lessening the energy available to set off the primer.

The average handloader is not going to do much QC beyond a visual inspection of the primer, and the “Finger Swipe” to check if it’s below flush. However someone manufacturing ammunition commercially will check using a depth gauge. This can be considered a critical dimension. Especially if a design study is conducted, like the one pictured below.

Every primer has an “Ideal” Gap between the anvil and the primer cup. This gap is filled by primer compound. There are a few variables that can affect this gap, but knowing what is ideal, can help establish your internal seating depth tolerance. Again this goes beyond what most hand loaders will do, but it is a thing that is looked at by commercial loaders.
Finishing Up
The purpose of this write up was to look at the many of the tools used to prepare the case for priming and then take a look at what tools are used for priming. Everyone’s process is a little different. I for one, do very little to my straight wall pistol brass, but pay a lot more attention to my rifle brass. For this reason it is rare for me to prime pistol brass off the press, however I prime all of my rifle brass off the press.

While most hobby progressive presses incorporate priming as part of the loading process, priming is almost always done as a separate operation by a separate machine in the commercial process. The exception to this is people using the Dillion 1050’s. Many commercial loaders don’t prime in house rather purchase their brass pre primed from the factory.
Undoubtedly we will do another write up discussing primers themselves, but hopefully this provides a good introduction to some of the tools and processes that are available. If you have experience with a bench priming tool, or some of the other tools mentioned, feel free to share it. Do you have a tool you think I should try? Let me know and I’ll add it to my wish list and give it a shot. Thanks for reading!